wuwu-aaart
Documentation
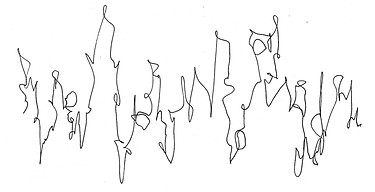
Sketch #1

Sketch #2

At first, I scribbled a random line on the paper, and when I drew it, I gave up control of the hand and tried to relax the wrist so that the curves stretched freely on the paper, with ups and downs very much like our life with its happy moments and low moments. Then I continued to work on the single line, adding some shadows and contour structures to it, and gradually, the image appeared like some plants growing on an ancient rock.
Once, when I visited the Metropolitan Museum of Art, I saw a rockery in a Chinese courtyard and recalled the profound connotation of rockery in traditional Chinese art. In the ancient view, its beauty resulted from integrating the souls of the natural world and the souls of people and constructing a subtle relationship with the surrounding things.
When I thought that the artwork's theme and the drawings' elements coincided with this, I became more explicit about creative goals. I hope the artwork brings the viewers a sense of it being a permanent presence in the landscape, witnessing the changes in human life from year to year and calmly and objectively recording all these in its language.
Sketch #3

Sketch #4
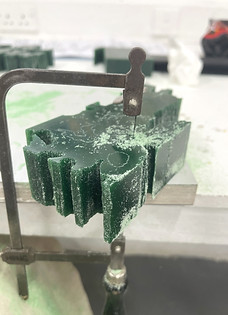


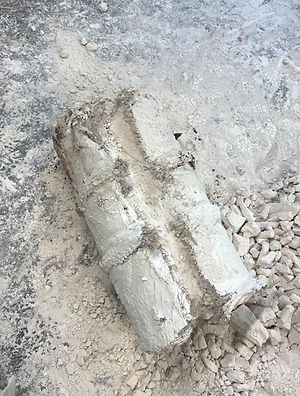
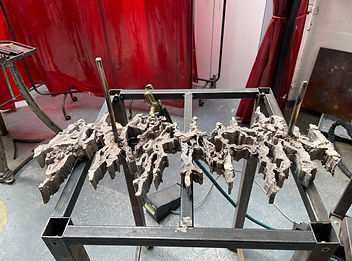
I prepared some wax blocks, but their largest size is 15*9*5cm; I can only choose to make wax moulds by segmented carving and then piecing them together, but splitting up the pieces to make them also provides some convenience for me to cut them differently angles.
According to the sketch, I used a carving tool to carve the outline I wanted on the wax blocks and then used a jigsaw to cut along the outline slowly. Due to the tricky curvature of the edge line, I had some trouble cutting it: If the jigsaw did not cut vertically up and down, the cut would offset, and the cut would just be tilted, and I did spend a significant quantity of time on this.
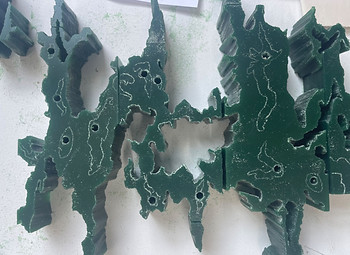
Some parts of the wax blocks needed to hollow out so that the jigsaw could not cut straight through, so I used a drill to drill holes in them and then removed the jigsaw blade to reach in and finish the cuts.
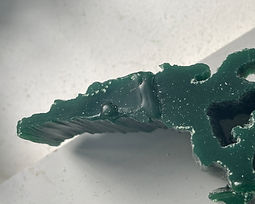
Finally, I placed all the cut blocks of wax in position and then touched the edge surfaces that needed to be joined with a hot knife so that the wax would melt with the heat and stick together.


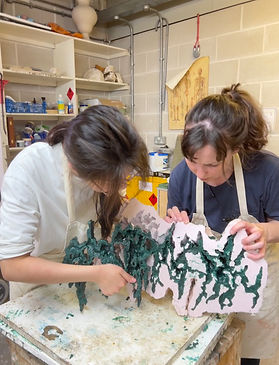
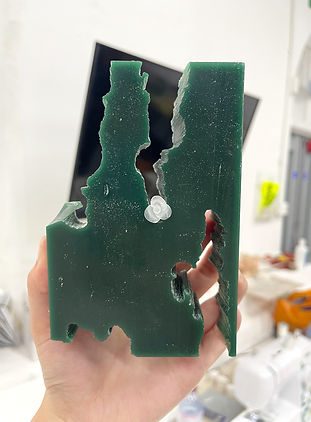
The next thing to do was to make a silicone mould. As the wax mould were solid, Lyndsey suggested that I turn a hollow, thin shell of wax so that the final piece would be lighter in weight. I followed Lyndsey to the casting room in Chelsea, as much of the equipment in the casting room was unavailable due to Camberwell's roof repairs.
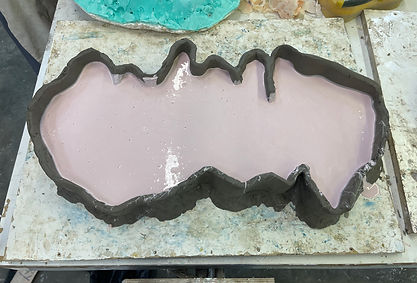
I started by placing the wax moulds smoothly on a wooden board, making sure there were no gaps between the mould and the board, and as the bottom of my mould was not wholly flat, Lyndsey gave me some soft wax to fill in these gaps. I then used some rolled-out clay to surround the wax mould to make it fit as close to the edge as possible; this could save some silicone material. Finally, I poured the blended silicone over the wax mould until it was covered and left to set. Once it had set, I removed the wax mould and left the silicone mould in place.


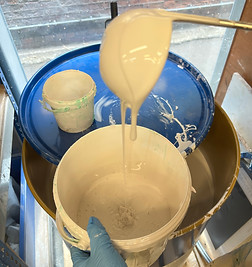
I heated some wax in a bucket on the hob and melted it to a liquid state, then poured it into a silicone mould; after the wax had cooled a little in the mould and a layer of wax had covered the walls of the mould, I quickly poured the un-solidified wax back into the bucket so that I could get a hollow wax mould. Lyndsey gave me a small brush to brush some wax over the areas not covered with wax to patch up the side. After the wax had solidified entirely and the temperature had dropped slightly, Lyndsey and I attempted to release the mould.
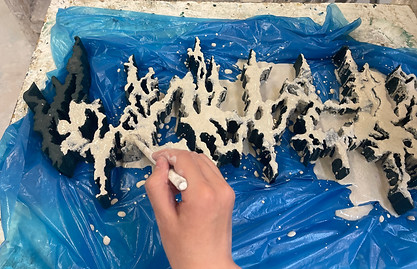


With the wax mould part of the casting now made, the next step was to wrap the wax mould in a mixture of casting sand. As my wax mould was tricky to shape, I used a brush to apply the sand slurry to every detailed part of the casting while the slurry was still flowing so that the detail of the casting piece would be well preserved.
Once the mixed sand has covered one side, I stand the whole mould upright and spread a generous amount of sand slurry underneath, waiting for it to set and then fixing the base to make it easier to subsequently build a wax tree on the surface of the casting.


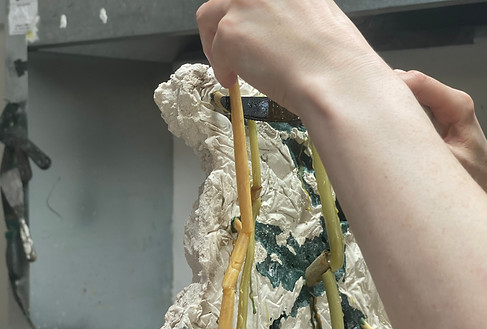


To build the wax tree, I rolled out some thinner strips of wax and then soaked them in a cold pool of water to cool and harden before removing them for use. According to the structural characteristics of the wax mould, I divided the whole of it roughly into five parts from top to bottom, and each part had to be connected with a wax strip between them to ensure that the bronze liquid could flow in it smoothly when casting.
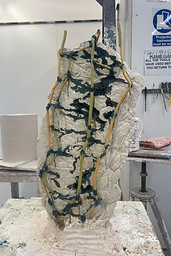
After building the wax tree, I covered the other side with sand slurry to completely wrap the mould. I added a section of wax strips at the top left and right and a bowl in the middle to create a convenient condition for the later casting.


I transferred the sand mould to a trolley, lowering it and encircling a ring of plastic sheeting to make it easier to continue pouring in more slurry to make it more solidly encased. Once the interior has completely solidified, I remove the plastic sheet and have a columnar sand mould ready to go into the kiln for firing.


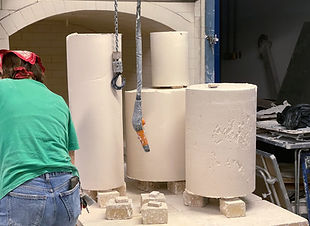
One by one, we place the sand moulds students have made on the kiln table with lifting hooks and put them smoothly on the kiln table to be fired together. The sand moulds are inverted and heated, and the wax melts into liquid form and flows out of the ceramic shells through the sprue openings so that the melted metal liquid can then be poured into the ceramic shells for casting.

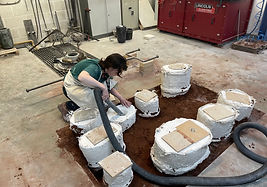


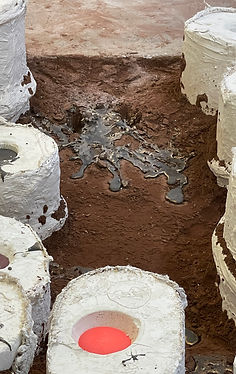
On the day of the pour, Lyndsey and I dug out a portion of the soil from the pit. We used it to bury the bottoms of the fired ceramic shells to hold them in place and used a dust hoover down the sprue to clean up the hollow portion of the ceramic shells so that no soil could interfere with the pouring system.
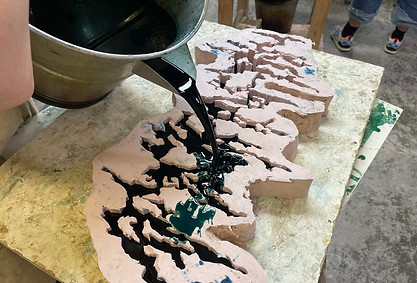
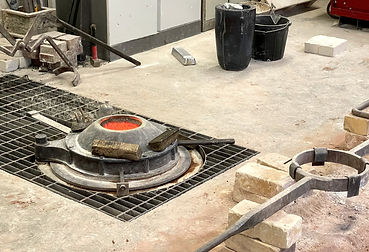
Once clean, I cover the sprue with a board to prevent recontamination. The next step is to put the bronze blocks into a high-temperature furnace and heat them to a liquid state, then pour the bronze liquid into the ceramic shells along the sprue.

Bronze Casting Process, Recorded at Chelsea College of Arts Foundry, June 2023


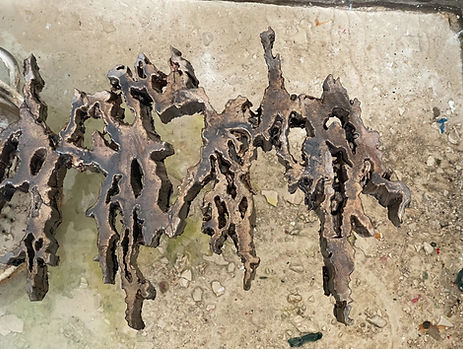
After a day of natural cooling, I split the ceramic shell with an axe to remove the casting and then used a wire brush, a chisel and other tools to roughly remove some of the remaining tricky bits on the surface.


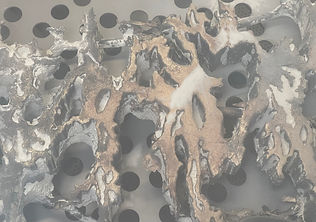


I put the roughly cleaned bronze piece into a sand blasting machine to thoroughly clean the surface and the many tricky crevices. Once cleaned, I moved the bronze pieces back to the cutting table, fixed them in place and then used the angle grinder to remove the bronze liquid running system in excess, leaving only the artwork parts.
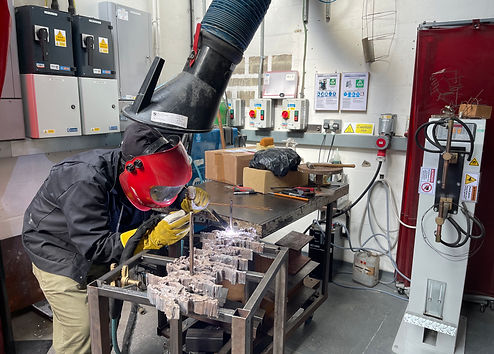
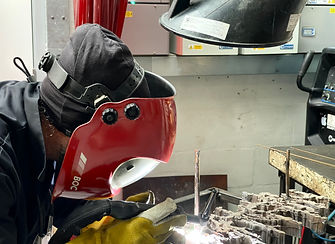
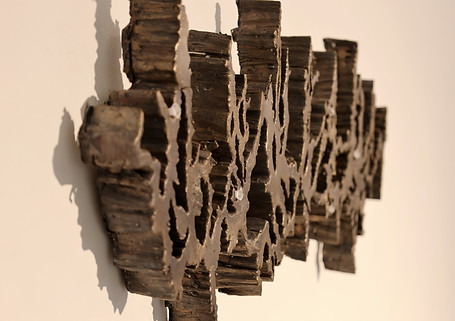
Considering how it would be installed at the exhibition, I was going to weld two longer bronze rods to the back of the bronze piece and install them after drilling holes in the wall.
Initially, I intended to weld about ten centimetres of bronze rods, and Daniel also suggested that I leave them longer so that they would be more secure and not allow the pieces to fall off the wall. However, as the wall at my place was a layer of cement inside, which the drill could not penetrate, the maximum space was only five centimetres, so I had no choice but to keep the bronze rods five centimetres long. However, fortunately, even though it was only five centimetres, the work ended up being well-fixed to the wall.

The last step was to colour the bronze. Daniel helped me to prepare an aqueous solution of Potassium Sulphide, which I spread evenly over the surface of the bronze. After ten minutes of repeated brushing, I could see the bronze change from its original yellowish colour to a darker brown. This operation increases the sense of time that the viewer feels when looking at the work, and it finally takes on the qualities of an object that has existed for a long time. Afterwards, I did surface polishing with a fine wire ball brush to increase its lustre in the light.


I wanted to add some changes to the original work. The initial plan was to prepare some small wax flowers and place them next to the work, allowing the audience to pick up the flowers and place them randomly on my work and then observe how the work differs from the initial effect to express the impact of something suddenly appearing on our life. However, during a tutorial, Olivia asked me how I could guarantee the audience would do this and what if they did not. Olivia thought that the characteristics of the material of the work might result in very few viewers approaching the work, as there is a quiet, intimidating quality to bronze that makes people feel solemn and even fearful of approaching the work.
This proved to be the case, as I observed that many of the visitors to the exhibition only looked at the artwork from a distance and then moved on. Very few of them were curious enough to look at the details of the work, so I was grateful that some of the visitors were willing to come closer and talk to me about what I was doing. This situation got me thinking and inspired me to make a piece at the Research Festival that the audience would want to engage with.
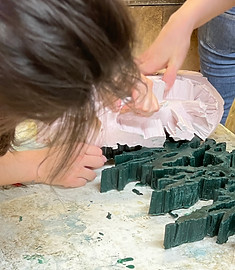
After Olivia made her suggestion, I thought it over, agreed with her and decided that I would be the one to keep placing little wax flowers on the work and letting them bloom in countless unexpected corners. When viewers see the work, they can feel the wax flowers change the work as a whole, as if unpredictable events have left traces on the veins of life and eventually become part of it. Moreover, bronze is made of wax, and I choose to use these two materials, which are progressive in process, to collide with each other, enhance the work's infectiousness, and bring the viewers to think about it in a certain way.

Wax Flowers Placement Process, Recorded at Camberwell Space, July 2023


Record of visitors at the exhibition, Photographed at Camberwell Space, July 2023